With all my talk of keychains I forgot to say how great Anthony's torsos are.
Well they are great, I can't wait for the new article.
Will
Brand New Torso Design (and I'm talking new minifig!)
-
Ye Olde Republic

- Marquis of Brique
- Posts: 1041
- Joined: Sat Nov 22, 2003 1:50 am
- Location: Calgary Alberta Canada
- Contact:
re
Yeah, those are awesome! I want to know more about this keychain though....
Trevor
Trust me, I think I'm funnier than you do.
Why do I have to add the word "minifig" to my spell checker every time I use it?!
[url=http://www.flickr.com/photos/old_republic/]flickr[/url]
[url=http://angrylegonerd.blogspot.com/]My blog[/url]
Trust me, I think I'm funnier than you do.
Why do I have to add the word "minifig" to my spell checker every time I use it?!
[url=http://www.flickr.com/photos/old_republic/]flickr[/url]
[url=http://angrylegonerd.blogspot.com/]My blog[/url]
-
TwoTonic Knight
- TwoTonic of Many Colors
- Posts: 1815
- Joined: Thu Dec 04, 2003 11:33 pm
- Location: The Lowest Pit of Megablocks
And to revive a long dead thread...wlister wrote:If you keep twisting and turning that pin, it will eventually come out. I managed to do this for a Snowtrooper keychain and at the price of a Snowtrooper, that was definitely worth it. If you use the keyring to help you turn the pin, it works its way out easier. I have also found that once the pin starts to come out, you can just give it a tug. Good luck,
Will
Actually, all I have been able to do so far is twist the thing so much that I bent the ring looped into the ring imbedded in the helmet and that part came off. So...
Keep twisting the the same direction? Clockwise, counter-clockwise...it ain't anti-clockwise in Canada, is it?
Just twist back and forth while pulling? These things go for $5-$8 on Bricklink - ahhhhhh, the potential destruction adds spice (okay, okay, they cost me 99 cents each).
Redwine the Ribald: Stare long enough into the abyss...
Two-Tonic Tippler: ...and you spit into it.
[img]http://www.brickshelf.com/gallery/corsair/C ... ippler.jpg[/img]
Two-Tonic Tippler: ...and you spit into it.
[img]http://www.brickshelf.com/gallery/corsair/C ... ippler.jpg[/img]
-
wlister
- Sheriff
- Posts: 1562
- Joined: Tue Sep 16, 2003 1:40 pm
- Location: There be no castles here.
- Contact:
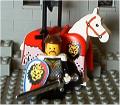
Here is a little walkthrough to make taking apart Wolfpack keychains easier. You could use this method for other keychains as well, but why would you want to? 
Step 1
Buy Keychain
Step 2
Place keychain on old worn out green baseplate so the whole picture is Lego.
http://www.brickshelf.com/gallery/wlist ... ychain.jpg
Step 3
Remove chain from keychain.
http://www.brickshelf.com/gallery/wlist ... chain1.jpg
Step 4
Grab keychain at the top of the screw. Wiggle it clockwise and anti-clockwise for a bit.
http://www.brickshelf.com/gallery/wlist ... chain0.jpg
Step 5
Grab a pair of pliers and carefully start pulling out the screw.
http://www.brickshelf.com/gallery/wlist ... chain2.jpg
Step 6
Fully remove the screw from the fig. If you don't, it will be hard to put new helmets on.
http://www.brickshelf.com/gallery/wlist ... chain3.jpg
There you have it. Nice and simple and I didn't even lose a finger.
Here is what the parts look like when you take the screw out.
http://www.brickshelf.com/gallery/wlist ... chain4.jpg
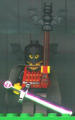
Here are a few ideas for what you can do with that nifty new fig:
http://www.brickshelf.com/gallery/wlist ... lfpike.jpg
http://www.brickshelf.com/gallery/wlist ... olearm.jpg
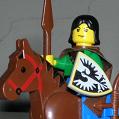
This is a nice pic:
http://www.brickshelf.com/gallery/wlist ... wolves.jpg
Here is what you do with the rest of the keychain.
http://www.brickshelf.com/gallery/wlist ... ychain.jpg
As you can see not too shabby at all. A bit expensive for a fig if you can't get tham at .99 cents each, but a decent fig nonetheless.
Will
After all that I had to edit because I put in a wrong link talk about killing the funny.
Step 1
Buy Keychain
Step 2
Place keychain on old worn out green baseplate so the whole picture is Lego.
http://www.brickshelf.com/gallery/wlist ... ychain.jpg
Step 3
Remove chain from keychain.
http://www.brickshelf.com/gallery/wlist ... chain1.jpg
Step 4
Grab keychain at the top of the screw. Wiggle it clockwise and anti-clockwise
http://www.brickshelf.com/gallery/wlist ... chain0.jpg
Step 5
Grab a pair of pliers and carefully start pulling out the screw.
http://www.brickshelf.com/gallery/wlist ... chain2.jpg
Step 6
Fully remove the screw from the fig. If you don't, it will be hard to put new helmets on.
http://www.brickshelf.com/gallery/wlist ... chain3.jpg
There you have it. Nice and simple and I didn't even lose a finger.
Here is what the parts look like when you take the screw out.
http://www.brickshelf.com/gallery/wlist ... chain4.jpg
Here are a few ideas for what you can do with that nifty new fig:
http://www.brickshelf.com/gallery/wlist ... lfpike.jpg
http://www.brickshelf.com/gallery/wlist ... olearm.jpg
This is a nice pic:
http://www.brickshelf.com/gallery/wlist ... wolves.jpg
Here is what you do with the rest of the keychain.
http://www.brickshelf.com/gallery/wlist ... ychain.jpg
As you can see not too shabby at all. A bit expensive for a fig if you can't get tham at .99 cents each, but a decent fig nonetheless.
Will
After all that I had to edit because I put in a wrong link talk about killing the funny.
Last edited by wlister on Wed Aug 11, 2004 10:59 am, edited 1 time in total.
After a long absence, I have returned. I can't wait to start building again.
-
doctorsparkles
- Landlord
- Posts: 995
- Joined: Sat Feb 28, 2004 10:42 pm
- Location: Medina, Ohio
- Contact:
Wow, I never realized that you could take the chains off of the keychains like that. I had an old Black Falcon one when I was little, and all the pieces were glued together. I still used it anyway, but I couldn't put my own helmet on or twist his hands around.
"Always do what you want, and say what you feel, because those who mind don't matter, and those who matter don't mind." ~ Doctor Suess
-
TwoTonic Knight
- TwoTonic of Many Colors
- Posts: 1815
- Joined: Thu Dec 04, 2003 11:33 pm
- Location: The Lowest Pit of Megablocks
Thanks. It worked...finally. What a literal pain! (looking at stack of 23 keychains and despairing)wlister wrote:Here is a little walkthrough to make taking apart Wolfpack keychains easier. You could use this method for other keychains as well, but why would you want to?
Redwine the Ribald: Stare long enough into the abyss...
Two-Tonic Tippler: ...and you spit into it.
[img]http://www.brickshelf.com/gallery/corsair/C ... ippler.jpg[/img]
Two-Tonic Tippler: ...and you spit into it.
[img]http://www.brickshelf.com/gallery/corsair/C ... ippler.jpg[/img]
-
TwoTonic Knight
- TwoTonic of Many Colors
- Posts: 1815
- Joined: Thu Dec 04, 2003 11:33 pm
- Location: The Lowest Pit of Megablocks
The fast method: If you don't mind the hole in the helmet and intend to use it, don't use this method, because it scars the helmet. Grip the head of the pin with the nippers part of the pliers (I did this with an old pliers I was just about to toss - you might well be wrecking the nippers with the hard steel of the pin, though mine looks okay). Lever the pin out - it helps to use your fingers as a longer fulcrum. Takes about two seconds but requires a very firm grip.TwoTonic Knight wrote:Thanks. It worked...finally. What a literal pain! (looking at stack of 23 keychains and despairing)wlister wrote:Here is a little walkthrough to make taking apart Wolfpack keychains easier. You could use this method for other keychains as well, but why would you want to?
Padding the top of the helmet and your fingers helps both your fingers (avoiding pain) and I actually got out the first one I tried without any scarring to the helmet. Still has a big hole in the top though.
Redwine the Ribald: Stare long enough into the abyss...
Two-Tonic Tippler: ...and you spit into it.
[img]http://www.brickshelf.com/gallery/corsair/C ... ippler.jpg[/img]
Two-Tonic Tippler: ...and you spit into it.
[img]http://www.brickshelf.com/gallery/corsair/C ... ippler.jpg[/img]
-
wlister
- Sheriff
- Posts: 1562
- Joined: Tue Sep 16, 2003 1:40 pm
- Location: There be no castles here.
- Contact:
The reason I twisted the pin around before I took the pliers to it was to prevent scarring the helmet. The larger-nosed pliers also gave me a better grip on the pin.
I am thinking of removing an arrow from a bow and putting it in the top of the hole. It should look funny in a battle scene.
Will
I am thinking of removing an arrow from a bow and putting it in the top of the hole. It should look funny in a battle scene.
Will
After a long absence, I have returned. I can't wait to start building again.
-
xxbattosaixx

- Foot Soldier
- Posts: 227
- Joined: Thu Jun 17, 2004 12:36 am
- Location: New Jersey
-
Commander Redbeard
- Bailiff
- Posts: 320
- Joined: Fri Feb 27, 2004 12:21 am
- Location: Northeastern USA
I saw those Wolfpacks at the Lego Store in Solomon's Pond, Mass. for 49 cents each. My mom's a jewler, so I'd just pinch one of her pliers or jewlery-wire-cutters and snip the chain right off. At least he then has the supernatural power of being unbeheadable! For ten bucks I could have an army of those things...
While on the subject of the Lego store, do any other outlets have any castle pieces in that fill-a-cup station thing? The best I got were some light grey 1x4s and 1x8 light grey 1/4ths. The foliage was useful too.
While on the subject of the Lego store, do any other outlets have any castle pieces in that fill-a-cup station thing? The best I got were some light grey 1x4s and 1x8 light grey 1/4ths. The foliage was useful too.
Sitting in a midnight glade
Firelight dancing off burnished blade
A Forestman sits
Wondering about the next day
But after three mugs of ale
Let it bring what it may.
Firelight dancing off burnished blade
A Forestman sits
Wondering about the next day
But after three mugs of ale
Let it bring what it may.
-
jamitjames

- Gentleman
- Posts: 774
- Joined: Fri May 14, 2004 12:13 pm
- Location: The Great North White, Canada
- Contact:
I don't like the Falcon and Crusader torsos. I realy like the Black Knight one and da KK one.
[url=http://radio.laml.org/]LAMLradio: LEGO Talk Podcast[/url]