Polishing Lego Bricks

Discussion of general LEGO topics
Post Reply
User avatar
condor
Serf
Posts: 10
Joined: Wed Oct 20, 2010 10:07 pm

Polishing Lego Bricks

Post by condor »

I've had a pile of used Lego that I didn't really want to use since the bricks were scratched and yellowed. One of my many hobbies is detailing my car, so I decided to put some of those tools to use. :) I documented my progress to see if I could really make these bricks look better.

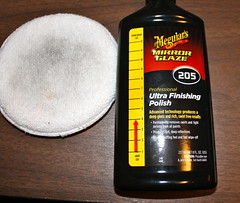
This first picture shows the stuff I used:

Meguiar's M205 Ultra Finishing Polish - Available online, or you can get Scratch X 2.0 at any Walmart, Target, etc.
Microfiber pad - You can also use an old towel or t-shirt

Image

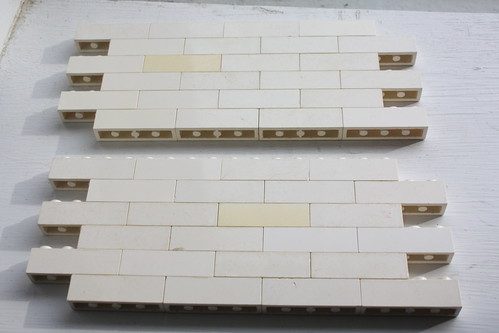
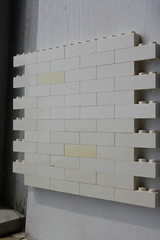
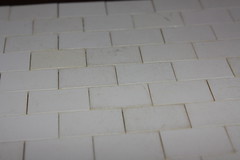
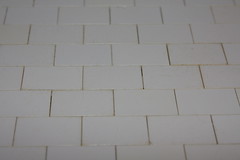
I washed these bricks individually using a toothbrush and dishwash soap when I got them, but as you can see, it wasn't enough to get some of the dirt, yellow tint, and scratches out. This is what they looked like after stacking them:

Image

Here's a close up of the bricks showing the damage:

Image

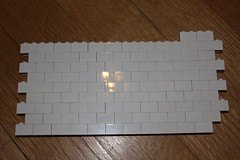
I put a pea sized amount of the polish on the pad and polished the brick wall using a lot of elbow grease. I rubbed the polish in for a few minutes until my arm got tired and this was the result:

Image

Here's a close up:

Image

It looks a little cleaner, but I think I can make it look better. Time for the big guns. :twisted:

I used a regular household drill and the foam pad attachment that came with the 3M Headlight Restoration Kit:

Image

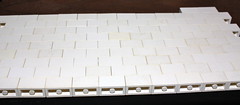
I set the brick wall on the ground, put a pea sized amount of polish on the pad and got to work. It's best to have somebody help you hold the wall down with two hands while you use both hands to hold the drill steady. I went across the wall 3-4 times. Afterwards, I washed the bricks with dishwashing liquid to get rid of the polishing oils and this was the result:

Image

And here's a close up:

Image

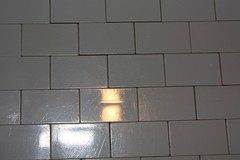
Is it perfect? No. 100 times better? Absolutely!

I was totally happy with the results and it didn't take much time to do. Next time though, I think I will skip the polishing by hand and just use the drilll. I'm sure you could get the same results if you stick to it, but you will have to put a lot of elbow grease into it and spend more time.

Just in case...

DISCLAIMER: I take no responsibility for the damage to your bricks, any property damage, bodily harm, or any other adverse effects that may arise directly or indirectly from this guide. Do so at entirely your own risk. This document is provided for information/education purposes only!
User avatar
Bluesecrets
High Priestess of the Vermillion Order
Posts: 2184
Joined: Sat Sep 04, 2004 6:21 pm
Location: On the girls side of the castle.
Contact:

Re: Polishing Lego Bricks

Post by Bluesecrets »

Wow those bricks look very shiny now. This brings up a question, now are you getting glare issues when you take your pictures?

Thank you for sharing. Maybe one day I shall attempt it also.
BrickshelfFlickr

Queen of Tan

Any building, is good building. Build for the fun of it!
User avatar
Shadowviking
Councilor
Posts: 1066
Joined: Thu Mar 08, 2007 7:04 pm
Location: Holland MI
Contact:

Re: Polishing Lego Bricks

Post by Shadowviking »

Shiny!
Nice find.
...and that's how Equestria was made!
[url=http://www.flickr.com/people/shadowviking/]flickr[/url] | [url=http://receptacle.tumblr.com/]tumblr[/url] | [url=http://tellers-tales.wikidot.com/]teller's tales[/url]
User avatar
KarenJ
Foot Soldier
Posts: 231
Joined: Wed Aug 29, 2007 5:10 pm
Location: Northern Illinois

Re: Polishing Lego Bricks

Post by KarenJ »

Looks great. How did the polishing work on the yellowed pieces? Are they any whiter?
Another question: If you combine these restored pieces with unrestored/regular pieces, and build a wall, is there any differences in thickness or texture (that is noticeable) between the two types?

My husband uses special plastic polishes in his radio restorations, and I've always wanted to try it on white bricks.
Karen

Left dark ages Jan '07
User avatar
condor
Serf
Posts: 10
Joined: Wed Oct 20, 2010 10:07 pm

Re: Polishing Lego Bricks

Post by condor »

KarenJ wrote:Looks great. How did the polishing work on the yellowed pieces? Are they any whiter?
Another question: If you combine these restored pieces with unrestored/regular pieces, and build a wall, is there any differences in thickness or texture (that is noticeable) between the two types?

My husband uses special plastic polishes in his radio restorations, and I've always wanted to try it on white bricks.
Here's a 50/50 shot of similar looking pieces.

Before
Image

After
Image

From the picture, it looks like the 2 severely yellowed pieces are similar in shade, but in the after photo, it looks a tad bit lighter in shade. It could just be because it was scratched and dirty though. It's hard to tell the extent of the damage in these small pics (400 pixel limit). If you click here to the flickr album, you can see the difference in the full size pics. They are the last two photos in the set.
http://www.flickr.com/photos/29290522@N ... 144935055/


There's really no difference in thickness that I can tell. As far as texture, it just feels smoother since the scratches are gone. They feel similar to any shiny new brick from a new set after the polish.
Post Reply